Few things are as frustrating in the kitchen as reaching for your salt cellar only to find a stubborn, clumpy block instead of free-flowing crystals. This common nuisance, often experienced with elegant glass salt cellars, can disrupt your cooking and compromise the quality of your favorite seasonings. Fortunately, keeping your salt dry and perfectly pourable is a battle easily won with the right strategies and a bit of understanding. This guide will walk you through effective methods to banish moisture, ensuring your glass salt cellars remain functional and your salt always ready to season.
Understanding the Enemy: Why Salt and Moisture Don’t Mix
Salt’s inherent nature is the root cause of its moisture-absorbing tendencies. Scientifically known as “hygroscopic,” salt actively draws in and retains water molecules from the surrounding air. This natural inclination means that in humid environments, or even just during daily kitchen activities like boiling water or running a dishwasher, your salt will eagerly absorb airborne moisture. The result is the unwelcome clumping or caking that renders your beautiful glass salt cellar frustratingly impractical. Beyond the inconvenience, excessive moisture can subtly alter the texture and even the subtle flavor profiles of specialty salts, diminishing their intended culinary impact.
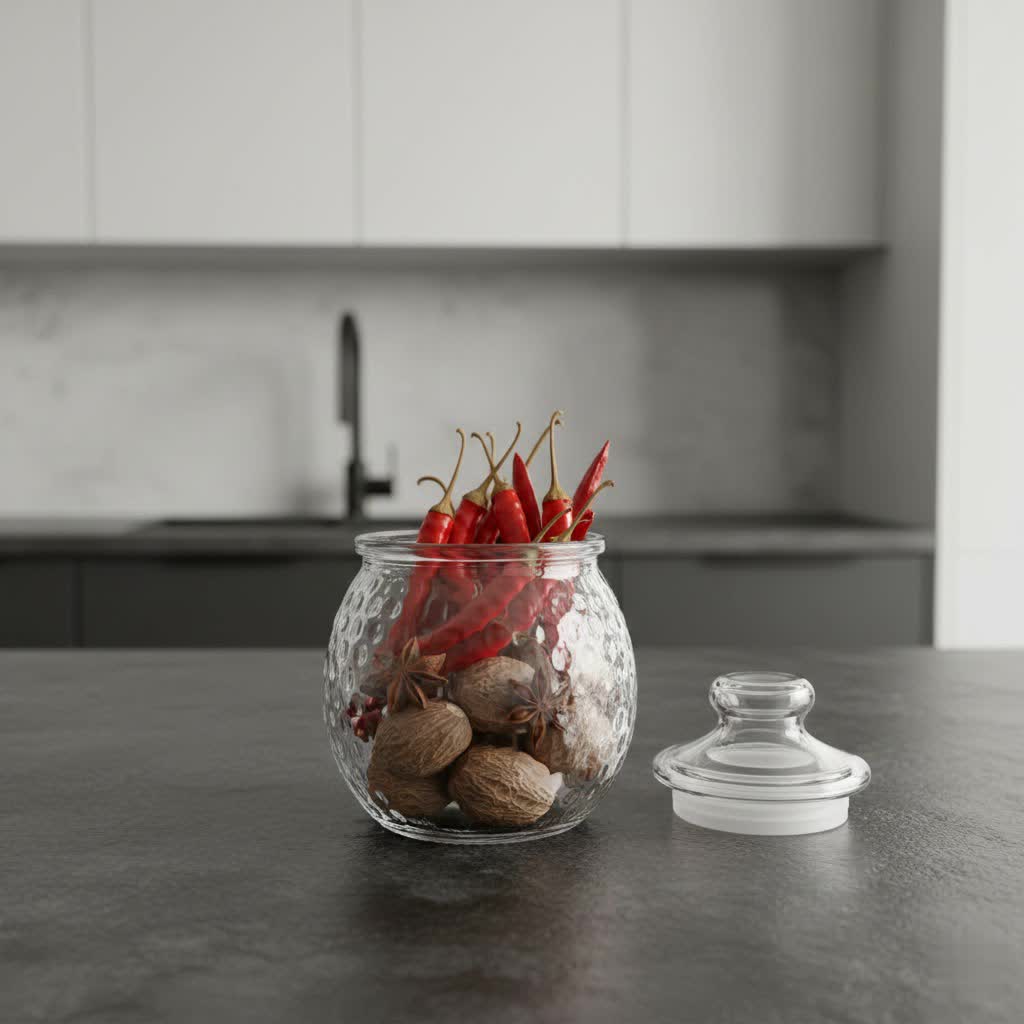
The Foundation: Choosing the Right Glass Salt Cellar and Proper Sealing
The first line of defense against moisture begins with your salt cellar itself. Glass is an excellent choice for salt storage due to its inert nature; it won’t react with the salt or impart any unwanted flavors, unlike some metals or plastics. Its transparency also allows for easy identification of contents and monitoring of salt levels. However, for maximum moisture protection, an airtight glass salt cellar is paramount. Look for designs with tightly fitting lids, rubber gaskets, or silicone seals that create an effective barrier against the outside air. Simply placing salt in an open ramekin or a loosely covered dish, while aesthetically pleasing, invites moisture to infiltrate freely. By ensuring a secure, impenetrable seal, you prevent humidity from ever reaching your precious salt.
Strategic Placement: Where to Store Your Salt Cellar for Optimal Dryness
Even the most airtight container can struggle in a continuously damp environment. The location of your glass salt cellar within your kitchen plays a crucial role in maintaining dry salt. Always opt for a cool, dark, and above all, dry spot. Areas near heat sources like your stove, oven, or even the dishwasher are moisture hotspots; the heat can cause condensation within the cellar, and steam from cooking will readily be absorbed by the salt. Similarly, keeping your salt cellar directly next to the sink can expose it to splashes and high ambient humidity. A pantry shelf, an inner cabinet, or a dedicated spice drawer, away from direct sunlight and heat, offers the ideal conditions to keep your salt consistently dry.
The Moisture Fighters: Effective Desiccants for Your Salt Cellar
Once you have the right cellar and ideal storage spot, desiccants offer an extra layer of protection, actively absorbing any lingering moisture.
The Classic Rice Trick
|
Our Picks for the Best Glass spice jar in 2026
As an Amazon Associate I earn from qualifying purchases.
|
||
| Num | Product | Action |
|---|---|---|
| 1 | SKOCHE Spice Jars 20 Pack Small 4 oz Glass Jars with Airtight Hinged Lids, Spice Herb Jars with Labels and Silicone Funnels, 4oz Glass Jars with Lids Ideal for Spice Herbs |

|
| 2 | Yangbaga 24Pcs Glass Spice Jars with Labels-4OZ Wood Lid Square Spice Containers with Pepper Grinder Lids &Funnel,Seasoning Jars for Rack Cabinet Drawer |
|
| 3 | Churboro 25 Spice Jars with 547 Labels- Glass Spice Jars with Black Metal Caps, 4oz Empty Spice Containers with Shaker Lids, Funnel, Chalk Pen, Square Seasoning Bottles for Spice Rack, Drawer, Cabinet |
|
| 4 | DkOvn 12pcs Glass Spice Jars, 4oz Empty Spice Jars with Metal Caps, Labels, Shaker Lids, Collapsible Funnel, Chalk Pen, Seasoning Organizer for Spice Rack |
|
| 5 | ZUFECY 4oz Glass Spice Bottles with Shaker Lids, Restaurant & Home Kitchen Storage | Square Air-Tight Containers for Spices, Salt, Pepper (Set of 6, 120ml) |
|
| 6 | ComSaf 4 oz 6Pcs Glass Spice Jars with Label, Empty Spice Containers with Bamboo Lids, Square Seasoning Containers Trial and Supplement Set, Small Seasoning Bottles for Salt, Herbs, Sugar, Pepper |
|
| 7 | 2Pcs 4oz Glass Spice Jars with Shaker Lids, Spice Jars Trial Set & Supplement Set, Empty Spice Containers and Square Spice Bottles for Kitchen (Bamboo Lids) |
|
| 8 | NETANY 24 Pcs Glass Spice Jars with Bamboo Lids, 4 oz Glass Jars with Minimalist Farmhouse Spice Labels Stickers, Collapsible Funnel, Seasoning Storage Bottles for Spice Rack, Cabinet, Drawer |
|
| 9 | 2 Pcs Glass Spice Jars/Bottles - 3oz Empty Round Spice Containers with Airtight Metal Caps with Shaker Lids (2, clear) |
|
| 10 | ComSaf 6Pcs 4oz Glass Spice Jars with Shaker Lids, 21 Labels, Spice Jars Trial Set & Supplement Set, Empty Spice Containers and Square Spice Bottles for Kitchen and Seasoning |
|
Adding a few grains of uncooked rice to your salt cellar is a time-honored and highly effective method. Rice is naturally hygroscopic, meaning it will absorb moisture from the air, preventing it from reaching your salt. You can add a tablespoon or two directly to the salt, or for easier removal and to prevent rice dust, place it in a small, breathable sachet made from cheesecloth or a mesh bag. This allows the rice to work its magic without mixing directly with your salt.
Beyond Rice: Other Natural Absorbers
Similar to rice, other natural, dry ingredients can act as moisture absorbers. A few dried beans, lentils, or even pieces of hard, dry pasta can be placed at the bottom of your salt cellar. These items provide a larger surface area for moisture absorption and are generally safe to have near food, though they should be changed periodically.
Silica Gel: A Powerful Ally (with precautions)
For maximum moisture absorption, food-grade silica gel packets are exceptionally effective. These small packets, often found in new shoe boxes or electronics, are designed to absorb significant amounts of moisture. It is crucial to use only food-grade silica gel and ensure they are clearly labeled as such to avoid any contamination risks. Place a small packet at the bottom of your salt cellar or within a sealed compartment if your cellar allows. Silica gel can often be regenerated by drying it in a low oven, making it a reusable solution.
“A well-maintained salt cellar not only preserves the quality of your salt but also elevates the efficiency and joy of your cooking experience, making every pinch a pleasure.” – Chef Antoine Dubois, Culinary Instructor
Smart Salt Choices: Does the Type of Salt Matter?
While all salt is hygroscopic, some types are more prone to clumping than others. Fine-grain table salt with its greater surface area, tends to absorb moisture more quickly and clump more readily. Coarse-grain salts, such as kosher salt, sea salt flakes, or Himalayan pink salt, generally have larger crystals and less surface area, making them naturally more resistant to clumping. If you live in a particularly humid climate or find yourself constantly battling clumpy salt, consider switching to a coarser variety for your everyday cooking. This simple change can make a noticeable difference in your salt’s free-flowing consistency.
Daily Habits: Maintenance Tips for a Dry Salt Cellar
Consistent care is key to keeping your glass salt cellar moisture-free. Regularly clean your salt cellar, especially when refilling it. Wash it with warm, soapy water and allow it to thoroughly air dry before adding fresh salt. Any residual water can immediately introduce moisture. When using your salt cellar during cooking, try to minimize its exposure to open air. Quickly open, pinch, and close the lid to reduce the time moisture has to ingress. If you notice any condensation forming inside, empty the salt, dry the cellar, and consider replacing your desiccant.
What to Do When Salt Gets Clumpy (and How to Revive It)
Even with the best precautions, sometimes salt can still clump. Don’t despair, it’s often revivable! For minor clumping, simply stirring the salt with a small spoon or tapping the cellar against a hard surface can break up the aggregates. If the salt is heavily caked, you might need to spread it out on a baking sheet and gently warm it in a low oven (around 200°F or 90°C) for 15-20 minutes, allowing the moisture to evaporate. Alternatively, spreading it on a plate and leaving it in a sunny, dry spot for a few hours can also help. Once dry, let it cool completely before returning it to a clean, dry, and properly prepared salt cellar.
Conclusion
A clumpy salt cellar is an unnecessary kitchen hassle, easily avoided with a few thoughtful practices. By choosing an airtight glass container, storing it in a dry location, utilizing effective desiccants like rice or food-grade silica gel, and adopting smart daily habits, you can ensure your salt remains perfectly dry and free-flowing. These simple steps not only enhance your cooking convenience but also preserve the integrity and flavor of your seasonings. Isn’t it time you enjoyed perfectly seasoned dishes without the struggle?
Frequently Asked Questions
Why does salt clump in a glass cellar?
Salt is naturally “hygroscopic,” meaning it readily absorbs moisture from the air. In humid conditions or when exposed to steam and heat, water molecules get absorbed into the salt crystals, causing them to stick together and form clumps. Airtight seals and desiccants are essential to combat this.
How much rice should I put in my salt cellar?
For an average-sized glass salt cellar (e.g., 4-6 oz), a tablespoon or two of uncooked rice is usually sufficient. You can add it directly to the salt or, for easier removal and to prevent mixing, place it in a small, breathable fabric sachet or mesh bag at the bottom.
Is it safe to put silica gel in a salt cellar?
Yes, but only if it is food-grade silica gel and clearly labeled as such. Industrial silica gel often contains harmful chemicals and should never be used near food. Food-grade packets are designed to be non-toxic and are effective at absorbing moisture, though they typically need regeneration or replacement over time.
Can I use paper towels to absorb moisture?
While paper towels can absorb moisture, they are generally not recommended for direct contact with salt in a long-term salt cellar. They can degrade over time, leave paper residue, and aren’t as efficient or long-lasting as desiccants like rice or silica gel for sustained moisture control.
What’s the best type of salt to resist clumping?
Coarse-grain salts, such as kosher salt, sea salt flakes, or larger-crystal specialty salts, tend to resist clumping better than fine-grain table salt. Their larger crystal structure means less surface area is exposed to moisture, making them less prone to absorbing humidity.
How often should I change the desiccant in my salt cellar?
The frequency depends on your local humidity and how often the salt cellar is opened. For rice, change it every 1-3 months, or sooner if you notice it becoming sticky or if the salt starts clumping again. Food-grade silica gel typically lasts longer but should be checked and regenerated or replaced when it appears saturated (often indicated by a color change).
Can I restore heavily clumpy salt?
Yes, heavily clumpy salt can often be revived. Spread the salt on a baking sheet and place it in a low oven (around 200°F or 90°C) for 15-20 minutes to evaporate the moisture. Alternatively, spread it on a plate in a warm, dry, sunny spot. Allow it to cool completely before returning it to a properly sealed, clean, and dry salt cellar.